A short while ago, we hung up the door we built earlier. Check out the gallery below for some pictures. Also, we got some goodies in the mail that we’ll get a lot of use out of in the near future.


A short while ago, we hung up the door we built earlier. Check out the gallery below for some pictures. Also, we got some goodies in the mail that we’ll get a lot of use out of in the near future.

To make a long story short, our old coffee table just plain tuckered out. Michelle had acquired it several roommates ago and its utility finally ceased to be. Its replacement was a coffee table I acquired two sets of roommates ago. It is sturdy and it looks nice, but it’s been sitting in disuse for a long time now, because the last time I moved we forgot to bring with the glass inserts that make up the majority of the table’s surface. Upon the death of the old coffee table, it has become clear that a revival project of sorts has been needed to bring this table back into use. So behold, the mosaic coffee table project has commenced. It is a combination of three loves: My love of building and construction, Michelle’s budding love for mosaics, and our mutual love for coffee tables and all their foot and feet holding splendor.
The project is a very simple one. This post will document the construction part of the project, and in the near future we will revisit this project to cover the mosaic making process. The materials we used were a small sheet of plywood 48” x 18” to fit the size of our table and 12′ of a small rectangular molding, both gathered from Home Depot for not much of a fee. We used a jigsaw to cut the plywood to the proper length and width. Then we cut out notches to allow relief for the legs of the table. We felt that it was a little weak to just screw directly through the plywood so we added some rectangular molding to the project. It allowed us to fasten both into the top and sides of the coffee table as can be seen in the pictures below. The molding adds the advantage of being tied into 2 different planes per side, but it also allows the distribution of the loads placed on each screw heads and like a washer helps prevent the screws from being pulled through the plywood if a heavy load is placed on it.
To be continued…
And may your days be filled with peace and gratitude.


Picture is from a recent stroll through our neighborhood in Minneapolis. We’ve really been enjoying the flowering trees this year. They look and smell amazing.
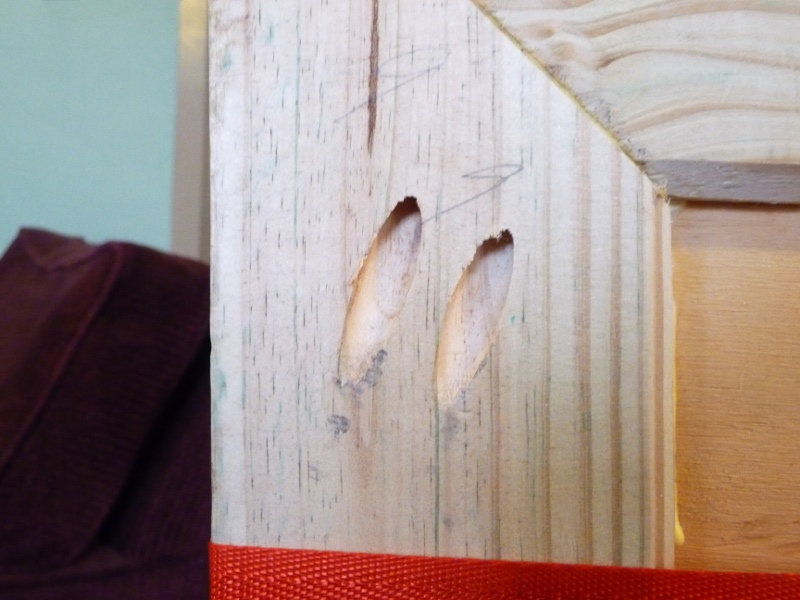
This past weekend we spent on my mom’s farm building the exterior door for the greenhouse. For the interior door, we just salvaged a normal door and frame, however the location where the exterior door goes is an unusual shape which required a custom door. Completing this door is very exciting for everyone, because it means that the greenhouse is completely enclosed, so it will start retaining more heat throughout the day.
This project was very doable, but required a certain amount of patience and precision. I wouldn’t recommend it for the DIYer who just hacks stuff together, but those who take the time to make sure everything is just right will have no real problems. Our door is unique in that the opening it’s going in is the least standard opening it could possibly be, so our challenges are a bit greater than what would be typical. The top is at a 45 degree angle since the roof is so low, and the bottom is also at an angle since the cement there is cracked and unlevel. Our door is a solid wooden door made out of the same siding as the rest of the greenhouse surrounded by a 2×4 frame.
The project started out at Nikole and Brad’s house, where they bought some 2×4’s and routed a channel down the center of the board to hold the interior panel. Then they routed a bevel on each side of the channel for decoration. They made each of the boards a foot longer than need be to allow us room for cutting. At the same time, my mom and grandfather trimmed the door frame.
Michelle, Reese, and I brought the routered 2x4s from the Twin Cities down to my mom’s farm. It was a tight fit in my little Saturn, but we all made it even though Reese grumbled a bit for not having the full back seat to lay down in. The first thing we had to do when we got there was to adjust the door frame, by adding some shims between the stud and the door frame where the door hinges would be mounted. The stud has a little twist in it at the bottom, so the shims helped straighten the door frame out. It is absolutely essential that the door frame be as straight as possible, because when you attach the door to a crooked door frame, it will bind when swung. This puts unnecessary stress on the door, hinges, frame, and user.
The next thing we did was to cut all the pieces of the frame to length and miter the corners. I would normally discourage people from mitering doors. Most doors aren’t mitered and for me it adds some unnecessary complexity to the process. For us, mitering seemed to be the best option, because all the other options seemed really hokey. The bottom of our door is 1 ½ inches higher on one side than the other. We contemplated shaving the bottom of the door to match the opening and decided against that because of aesthetics. We thought about adding a spacer under the sill board which would be harder to cross with a loaded wheel barrow. It also seemed more difficult than just building the door to fit the opening. To determine the angles for the miters, we cut samples out of scrap wood and tested them for fit, then we made adjustments and retested. We slowly worked our way around the whole door making sure that the lengths and miter angles were spot on. After getting all the 2x4s cut, we cut the insert to fit inside the frame. First we got the width right. We adjusted the other sides to fit the door we were making. Finally, we test fit it up and discovered that one of the boards was slightly too long. We shortened it a hair and got it to fit together well.
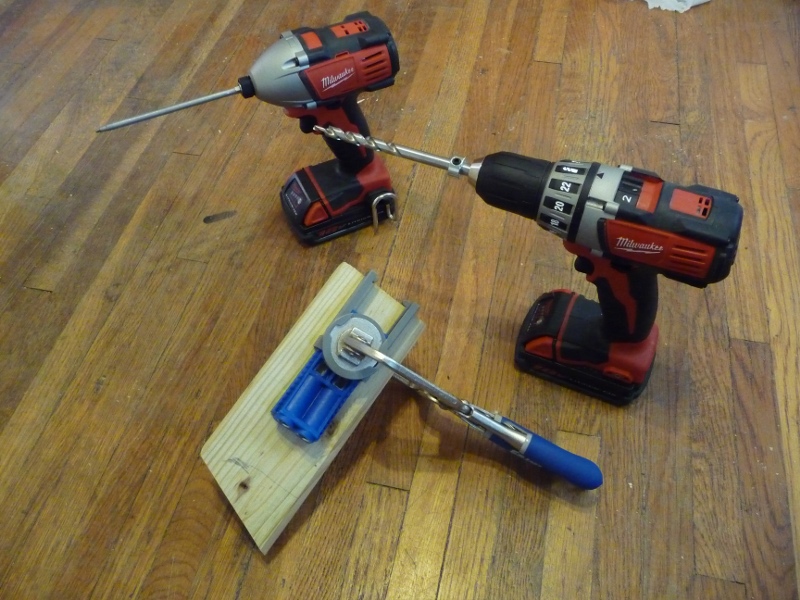
Assembly was a whole different beast, easier, but the devil is in the details and it was a race to the finish before the wood glue dried. The first thing we did was lay it all out in the dining room, where it was warm enough for the glue to cure properly. We planned our attack on where to put the pocket holes. Then we put the pocket holes into the individual pieces. We used a Kreg pocket hole jig kit for this, which made the process really easy. One thing we learned the hard way is that the long extension bit was really essential to getting deep into the pocket holes in a 2×4. We had a shorter bit and it really didn’t get the screw firmly seated in there.
Next we glued the 2×4 to the insert. We hammered them lightly into place and clamped them together using ratcheting tie downs. When we got it all glued we screwed all the corners together. On the top and bottom corners we added an extra screw coming straight up or straight down. This was in addition to the two pocket screws. We added this extra screw, because we were worried about the pocket screws being at an angle and tweaking the miter joint as it pulled tight. We also used the clamp from the pocket hole kit to clamp the joints together to keep them even while we screwed them together. This whole process seemed to work fairly well for us. It took a while because it was our first time. Next time, I would anticipate it would go quicker and smoother.
On a complete and utterly pointless tangent, I want to talk about the cordless drill and impact driver kit I got as a gift last year. They, along with the pocket hole kit are shown in the photos below. I’ve never used an impact driver before, so I can’t really compare it to other drivers, but this one is amazing. It is significantly better than a standard drill for driving in screws. It just seems to have more power and more control. Combined with better bits (square drive, torx, or hex head) it is a very nice experience. I was standing on a ladder putting some screws into some metal trim on our barn and the screws went in so easily even with outstretched arms and little leverage. I really don’t think I can go back to slotted or phillips screws. Plus when you have a drill and a driver, you can use the drill as a drill and the driver as a driver, without messing around with changing bits all the time.
Back to the door though, the last time I saw it, it was sitting in my mom’s dining room letting the glue dry. In the near future, my grandpa and mom will hang the door in the greenhouse and install the door handle. I promise to put some pictures up once they get it hung as I feel like the door may have that cute cottage feel going on.
Thanks a lot of for checking in on our progress. We appreciate it a lot.


 Hi, I'm Nathan Maus and I'm striving to take full responsibility for creating the world I want to live in. I created this website to share with you what I've learned.
One of the big projects I'm working on right now is the construction of a winter greenhouse, built using passive solar methods. My passion leads me towards local, nutrient-dense foods and the restructuring of our social-political-economic systems to better benefit all of us.


